briggs and stratton single cylinder ohv repair manual pdf
Embarking on Briggs & Stratton OHV repair? Accessing the correct 289707 PDF manual is your first step, ensuring successful engine maintenance and longevity.
What is an OHV Engine?
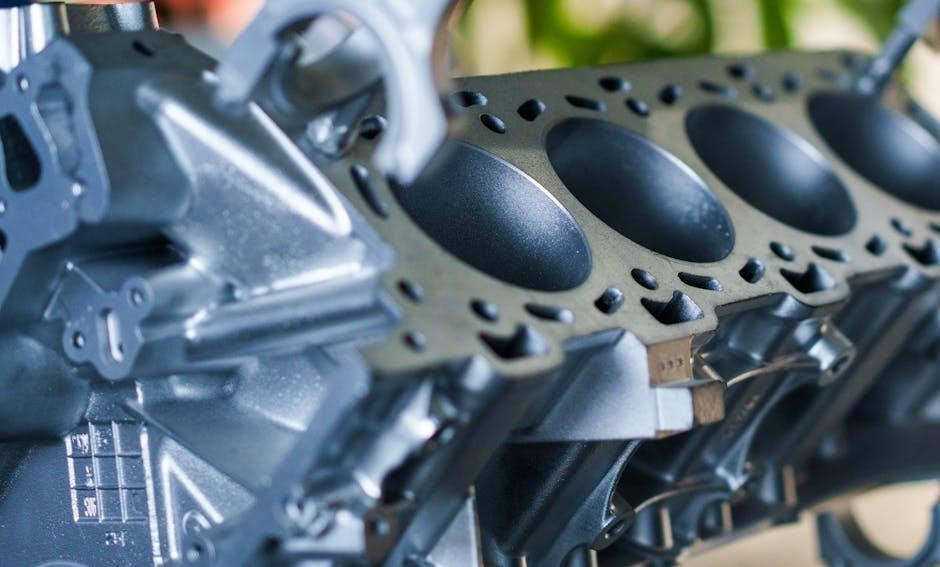
An Overhead Valve (OHV) engine, commonly found in Briggs & Stratton single-cylinder models, positions the valves in the cylinder head above the piston. This design, utilizing pushrods and rocker arms, enhances volumetric efficiency compared to older flathead engines.
The 289707 repair manual PDF details this configuration, crucial for understanding disassembly and reassembly. OHV engines offer a balance of simplicity, reliability, and power, making them ideal for lawnmowers, generators, and other small equipment. Proper maintenance, guided by the manual, ensures optimal performance and extends engine life.
Why a Repair Manual is Essential
Attempting Briggs & Stratton OHV repair without a manual, like the 289707 PDF, is risky. These engines contain specific components and torque specifications vital for correct operation. The manual provides detailed diagrams, step-by-step instructions, and troubleshooting guides, preventing damage and ensuring safety.
It’s a comprehensive resource for both novice and experienced mechanics. Accessing the correct PDF version streamlines the process, offering clarity and minimizing errors. Ignoring the manual can lead to costly mistakes and a non-functional engine.
Understanding the Briggs & Stratton Repair Manual PDF (289707 & Similar)
Briggs & Stratton manuals, like the 289707 PDF, are crucial guides for engine repair, offering detailed schematics and procedures for optimal performance.
Locating the Correct Manual
Identifying the precise repair manual for your Briggs & Stratton engine is paramount. Begin by noting the engine model number, typically found on the engine’s valve cover or blower housing. Utilize the Briggs & Stratton website, entering this number to pinpoint the corresponding PDF manual – often the 289707 or a similar variant.
Ensure the manual’s coverage aligns with your engine’s specific year of manufacture. Dealers also provide access through platforms like the PowerPortal. Incorrect manuals can lead to improper repairs, potentially damaging your engine. Prioritize accuracy for a successful outcome.
PDF Manual Features & Navigation
Briggs & Stratton repair manual PDFs, like the 289707, are typically searchable, allowing quick access to specific components or procedures. Most feature interactive tables of contents and clickable page numbers for easy navigation. Zoom functionality enhances readability of detailed diagrams and illustrations.
Familiarize yourself with the manual’s structure; sections are often organized by engine system (carburetor, ignition, etc.). Utilize the ‘find’ function (Ctrl+F) to locate keywords. Regularly updated versions may exist, so confirm you have the latest revision for accurate information.
Manual Revision Numbers & Updates
Briggs & Stratton frequently updates repair manuals, like the 289707 PDF, to reflect design changes, improved procedures, or safety updates. Always check the revision number and date located on the manual’s cover or within the document itself. Newer revisions supersede older ones, ensuring accuracy.
Visit the official Briggs & Stratton website (see Resources) to verify if a more recent version of your manual is available for download. Using an outdated manual could lead to incorrect repairs or safety hazards. Prioritize the latest revision for optimal results.
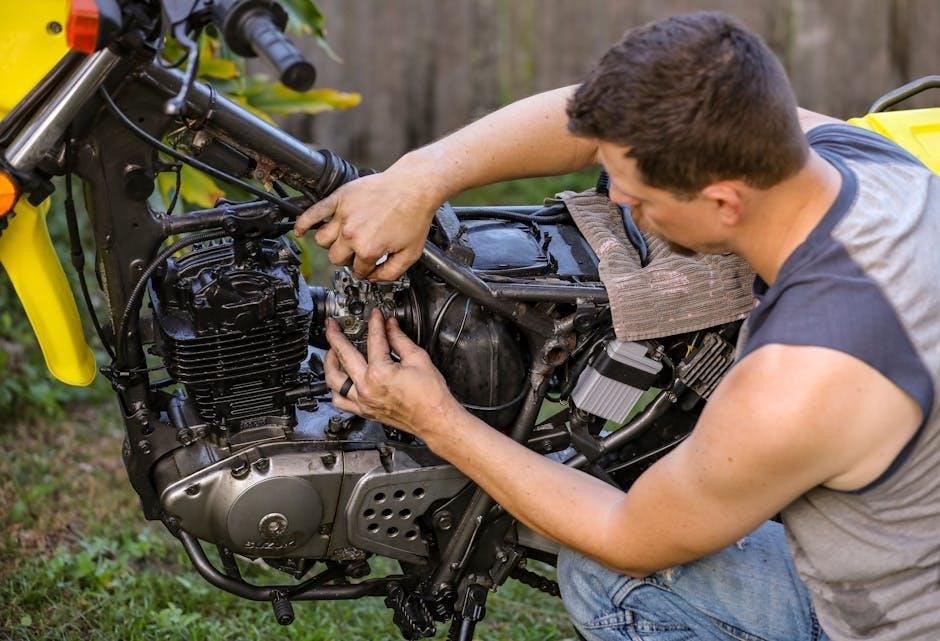
Essential Tools for Briggs & Stratton OHV Repair
Successful repairs demand the right tools! From basic hand tools to specialized equipment, having a well-equipped toolkit is crucial for efficient engine work.
Basic Hand Tools
A solid foundation for any Briggs & Stratton OHV repair begins with a comprehensive set of basic hand tools. This includes a variety of socket wrenches, both standard and metric, alongside open-end and box-end wrenches covering a similar range of sizes.
Screwdrivers – Phillips head and flathead – in multiple sizes are essential, as are pliers, including needle-nose and slip-joint varieties. Don’t forget a reliable hammer, and a set of feeler gauges for precise valve adjustments. A torque wrench is also vital for ensuring fasteners are tightened to the manufacturer’s specifications, preventing damage.
Specialized Tools (Valve Spring Compressor, etc.)
Beyond basic hand tools, certain specialized equipment significantly simplifies Briggs & Stratton OHV repair. A valve spring compressor is crucial for safely removing and installing valve springs, a frequent task during valve jobs. A piston ring compressor is essential for installing new pistons without damage.
Leak-down testers help diagnose compression issues, while a flywheel puller facilitates removing the flywheel for ignition system work. A timing light aids in accurate ignition timing. These tools, often referenced within the repair manual PDF, ensure efficient and professional results.
Safety Equipment
Prioritizing safety is paramount when undertaking Briggs & Stratton OHV repairs. Always wear safety glasses to protect your eyes from debris. Nitrile gloves shield your hands from harsh chemicals like solvents and gasoline. A respirator is recommended when working with carburetor cleaners or paints, ensuring proper ventilation.
Sturdy work boots protect your feet, and appropriate clothing prevents skin contact with engine components. The repair manual PDF often highlights safety precautions; heed these warnings diligently to prevent injury during the repair process.
Disassembly Procedures
The Briggs & Stratton repair manual PDF guides meticulous disassembly. Carefully follow steps for cylinder head, crankcase, and carburetor removal, noting component placement.
Removing the Cylinder Head
The Briggs & Stratton repair manual PDF details cylinder head removal. Begin by disconnecting the spark plug wire for safety. Next, carefully remove the valve cover and any associated linkages. Loosen the cylinder head bolts in a crisscross pattern, gradually, to prevent warping.
Once loose, completely remove the bolts. Gently lift the cylinder head, potentially using a rubber mallet if it’s stuck, avoiding damage to the gasket surface. Inspect the head gasket for condition and note its orientation for reassembly. The manual’s diagrams are crucial for proper bolt order and torque specifications.
Disassembling the Crankcase
The Briggs & Stratton repair manual PDF guides crankcase disassembly. After draining the oil, remove the blower housing and any attached components. Carefully detach the carburetor and exhaust system. Unscrew the crankcase bolts, often requiring penetrating oil if corroded, following the manual’s specified sequence.
Gently separate the crankcase halves, noting the position of the crankshaft and connecting rod. Inspect bearings and seals for wear. The PDF provides detailed exploded views, vital for remembering component placement during reassembly and identifying necessary replacement parts.
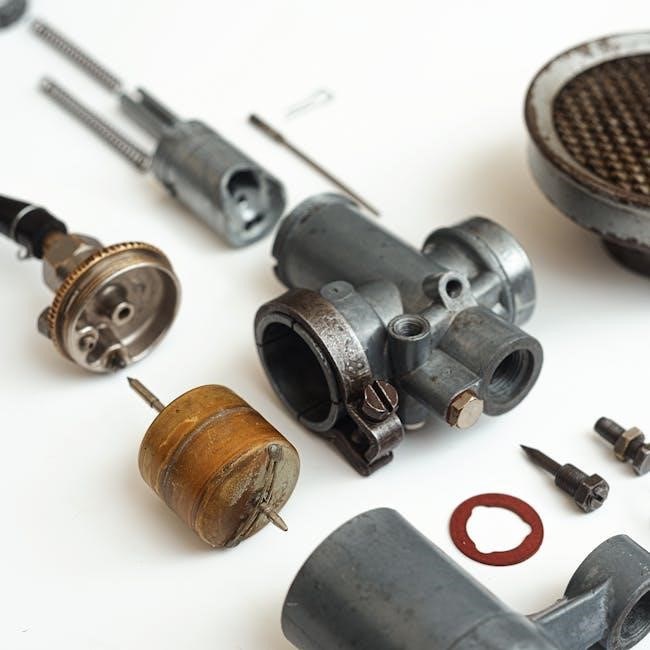
Removing the Carburetor
The Briggs & Stratton repair manual PDF details carburetor removal. Disconnect the fuel line, taking precautions against spills, and detach the throttle and choke linkages. Note their positions for correct reinstallation. Remove any retaining bolts or screws securing the carburetor to the engine.
Gently pull the carburetor away from the engine, being mindful of any remaining gaskets. The PDF’s diagrams illustrate these steps clearly. Inspect the carburetor mounting flange for damage and retain all small parts for reassembly, referencing the exploded views within the manual.
Common Briggs & Stratton OHV Problems & Solutions
The repair manual PDF pinpoints frequent issues like carburetor faults, valve problems, and low compression, offering detailed diagnostic steps and effective repair solutions.
Carburetor Issues (Flooding, Lean Mixture)
The Briggs & Stratton repair manual PDF dedicates significant attention to carburetor troubleshooting. Flooding often stems from a stuck needle valve or excessive fuel levels, while a lean mixture indicates insufficient fuel delivery.
Detailed diagrams within the manual guide you through disassembly, cleaning, and inspection of jets, the float, and the needle valve. It emphasizes the importance of using carburetor cleaner and compressed air to remove obstructions.
The PDF provides precise specifications for jet sizes and float height adjustments, crucial for restoring optimal engine performance. Correcting these issues often resolves starting problems and ensures smooth operation.
Valve Problems (Burning, Sticking)
The Briggs & Stratton repair manual PDF thoroughly covers valve issues, detailing causes for burning and sticking. Burning valves typically result from excessive heat or improper fuel mixture, while sticking valves are often due to carbon buildup or corrosion.
The manual provides step-by-step instructions for valve inspection, lapping, and replacement. It emphasizes the importance of checking valve clearances using feeler gauges, adhering to specified tolerances.
Diagrams illustrate proper valve spring compressor usage for safe removal and installation. Addressing valve problems restores compression and prevents further engine damage, ensuring efficient operation.
Low Compression Causes & Fixes
The Briggs & Stratton repair manual PDF dedicates significant attention to diagnosing and resolving low compression. Common causes include worn piston rings, scored cylinder walls, leaky valves, and a blown head gasket. The manual details compression testing procedures, outlining acceptable pressure ranges.
It provides detailed instructions for inspecting piston rings and cylinder bore for wear, and valve seating for leaks.
Fixes range from simple gasket replacement to complete engine overhauls, with torque specifications and diagrams for proper reassembly, restoring optimal engine performance.
Detailed Repair Steps
The Briggs & Stratton PDF manual provides step-by-step instructions, diagrams, and torque specs for carburetor rebuilds, valve adjustments, and piston/ring replacements.
Carburetor Cleaning & Rebuild
The Briggs & Stratton repair manual PDF (like 289707) details a thorough carburetor cleaning process, emphasizing disassembly for inspection of jets, needles, and seats. It guides you through identifying and resolving issues like flooding or lean mixtures.
Rebuild kits are often recommended, and the manual illustrates proper gasket replacement and adjustment procedures. Pay close attention to diagrams showing the correct placement of all components. Accurate reassembly, following torque specifications, is crucial for optimal engine performance and preventing future carburetor-related problems.
Valve Lapping & Adjustment
The Briggs & Stratton repair manual PDF (e.g., 289707) provides detailed instructions for valve lapping, a critical process for ensuring a proper seal. It explains how to apply lapping compound and rotate the valves to achieve a smooth, consistent surface.
Proper valve adjustment is also covered, outlining the correct valve lash specifications and adjustment methods. Accurate valve timing is essential for optimal engine compression and performance, preventing issues like burning or sticking valves, as detailed within the manual’s diagrams.
Piston & Ring Replacement
The Briggs & Stratton repair manual PDF (like 289707) meticulously guides piston and ring replacement. It details cylinder bore measurement to determine if a piston oversize is needed, crucial for restoring compression.
Instructions cover proper ring gap specification, ring installation orientation, and piston pin retention methods. The manual emphasizes using a piston ring compressor for safe installation, preventing damage. Following these steps, found within the PDF, ensures optimal engine rebuild and performance.
Ignition System Repair
The Briggs & Stratton repair manual PDF (289707 & similar) provides detailed testing procedures for the ignition coil and magneto, ensuring proper spark.
Testing the Ignition Coil
The Briggs & Stratton repair manual PDF (like 289707) outlines specific procedures for testing the ignition coil’s primary and secondary windings using a multimeter. It details acceptable resistance ranges, helping identify shorted or open coils.
Proper testing, as illustrated in the manual, involves disconnecting the coil wire and checking for continuity to ground. The manual also explains how to visually inspect the coil for cracks or damage. Accurate coil testing, guided by the PDF, is crucial for diagnosing starting problems and ensuring optimal engine performance.
Replacing the Spark Plug
The Briggs & Stratton repair manual PDF (e.g., 289707) provides detailed steps for spark plug replacement, including the correct torque specifications to avoid damage; It emphasizes using the recommended spark plug type for optimal engine operation.
The manual illustrates removing the spark plug wire and utilizing a spark plug socket; It also highlights the importance of checking the gap before installation, referencing specific gap measurements. Following the PDF’s guidance ensures a secure fit and proper ignition, contributing to efficient engine performance and longevity.
Magneto Troubleshooting
The Briggs & Stratton repair manual PDF (like 289707) details magneto troubleshooting, focusing on air gap adjustments and coil testing procedures. It explains how to check for a strong spark using a spark tester, a crucial diagnostic step.
The manual illustrates inspecting the flywheel key for shear, a common cause of ignition failure. It also guides users through testing the magneto coil’s resistance with a multimeter, referencing acceptable values. Proper magneto function, as outlined in the PDF, is vital for reliable engine starting and running.

Governor System Repair
The Briggs & Stratton repair manual PDF (289707) provides detailed diagrams and instructions for governor linkage adjustment and gear inspection procedures.
Governor Linkage Adjustment
Refer to your Briggs & Stratton repair manual (like 289707) for precise governor linkage adjustment steps. Incorrect adjustment leads to surging or unstable engine speeds. The manual illustrates proper linkage connections and provides specifications for governor spring tension.
Carefully examine the diagrams to ensure correct routing of the control cable and linkage arms. Adjust the linkage to achieve the specified governor response – typically, a smooth return to idle speed when the throttle is released. Always verify adjustments with a tachometer, referencing the manual’s recommended RPM range.
Governor Gear Inspection
Your Briggs & Stratton repair manual (e.g., 289707 PDF) details governor gear inspection procedures. Examine the governor gear and pinion for wear, damage, or broken teeth. Smooth, consistent engagement is crucial for proper engine speed regulation.
Check for excessive play between the gears; any looseness indicates potential issues. Lubricate the gears with engine oil as specified in the manual. Replace worn or damaged gears as a set to maintain optimal governor function and prevent future performance problems. Refer to exploded views in the manual for correct part identification.
Oil System Maintenance & Repair
The Briggs & Stratton repair manual (like 289707 PDF) guides oil system checks, including pump inspection and filter replacement, for optimal engine lubrication.
Oil Pump Inspection
Referring to your Briggs & Stratton repair manual (specifically PDF 289707 or similar), carefully inspect the oil pump for wear or damage. The manual details procedures for removing the pump to assess the gears for scoring, cracks, or broken teeth.
Check the pump body for any signs of leakage or corrosion. Verify the oil pump drive engagement – ensuring proper connection to the crankshaft. The manual provides diagrams illustrating correct assembly and torque specifications. A functioning oil pump is crucial for delivering adequate lubrication, preventing premature engine wear and ensuring reliable operation.
Oil Filter Replacement
Your Briggs & Stratton repair manual (PDF 289707 and related versions) outlines the oil filter replacement process. Locate the filter – typically positioned on the engine block. Use an oil filter wrench to loosen and remove the old filter, being mindful of residual oil.
Lightly lubricate the gasket of the new filter with fresh oil before installation. Hand-tighten the filter until the gasket contacts the engine, then tighten an additional half to three-quarters turn, as specified in the manual. Proper filter replacement maintains oil cleanliness, extending engine life.

Cooling System Considerations
The Briggs & Stratton repair manual (PDF) stresses maintaining clean cooling fins and inspecting the blower housing for debris, ensuring optimal engine temperature regulation.
Fin Cleaning
The Briggs & Stratton repair manual PDF (like 289707) consistently emphasizes the critical importance of keeping the cylinder fins meticulously clean. Accumulated debris – grass clippings, oil residue, and dirt – significantly restricts airflow, leading to overheating. Overheating causes premature engine wear, potential damage to vital components, and reduced overall performance.
Regularly inspect the fins and use a brush, compressed air, or a specialized fin cleaning tool to remove obstructions. A clean cooling system, as detailed in the manual, is paramount for reliable operation and extending the engine’s lifespan.
Blower Housing Inspection
The Briggs & Stratton repair manual PDF (specifically referencing models like 289707) details a thorough inspection of the blower housing as a crucial cooling system component. Check for cracks, damage, or obstructions within the housing itself. Debris accumulation here severely restricts airflow, mirroring the impact of dirty cylinder fins.
Ensure the blower fan is securely attached and undamaged. A compromised blower housing or fan diminishes cooling efficiency, contributing to overheating and potential engine failure. The manual stresses preventative maintenance here.
Reassembly Procedures
The Briggs & Stratton 289707 PDF manual guides precise reassembly, emphasizing correct torque specifications and component alignment for optimal engine performance.
Crankcase Reassembly
Referring to the Briggs & Stratton 289707 PDF manual, carefully align the crankshaft and connecting rod assembly within the crankcase halves. Apply the specified gasket sealant to mating surfaces before joining them, ensuring a proper seal.
Torque the crankcase bolts in a crisscross pattern to the manufacturer’s specifications, preventing warping or leaks. Verify oil passages are clear and unobstructed before proceeding. The manual details bearing installation and proper endplay adjustments, crucial for longevity. Double-check all fasteners and clearances before moving to the next stage.
Cylinder Head Installation
Consult the Briggs & Stratton 289707 PDF manual for precise torque specifications when installing the cylinder head. Ensure the head gasket is correctly positioned, aligning all coolant and oil passages. Carefully lower the head onto the block, avoiding any misalignment that could cause damage.
Torque the head bolts in the specified sequence – typically in multiple stages – to achieve uniform clamping force. Verify valve clearances after installation, referencing the manual’s guidelines. A properly installed head is vital for compression and engine performance.
Final Checks Before Starting
Before the initial start, meticulously review the Briggs & Stratton 289707 PDF manual’s checklist. Confirm all connections – fuel lines, wiring, and linkages – are secure and properly routed. Verify oil level and add if necessary, referencing the manual’s capacity specifications.
Double-check the spark plug connection and ensure the carburetor is primed according to the manual’s instructions. Rotate the engine manually to confirm free movement and check for any obstructions. These final steps prevent damage upon startup.
Troubleshooting After Repair
Consult the Briggs & Stratton 289707 PDF manual for diagnostic charts addressing no-start conditions or poor performance post-repair, ensuring accurate solutions.
No Start Conditions
When facing a no-start situation after repair, the Briggs & Stratton 289707 PDF manual is invaluable. Systematically check fuel delivery – is fuel reaching the carburetor? Verify spark plug functionality and ignition coil output using the manual’s testing procedures. Compression is critical; the manual details how to assess it.
Also, inspect the safety interlocks, ensuring they aren’t preventing engine start. Refer to wiring diagrams within the PDF to confirm proper connections. A thorough review of the manual’s troubleshooting section will pinpoint the root cause efficiently.
Poor Performance Issues
If your repaired Briggs & Stratton engine runs poorly, consult the 289707 PDF manual for diagnostic guidance. Common causes include a dirty carburetor, requiring cleaning as detailed in the manual. Check valve clearances; incorrect settings lead to reduced power. Inspect the spark plug for fouling or damage, referencing the manual’s specifications.
Low compression, addressed via piston/ring assessment in the PDF, also causes issues. Verify governor linkage adjustment per the manual’s instructions. A lean or rich fuel mixture needs carburetor tuning, guided by the manual’s procedures.

Resources & Further Information
For expanded support, explore the official Briggs & Stratton website and online forums; the 289707 PDF manual is a great starting point!
Briggs & Stratton Website
The official Briggs & Stratton website (briggsandstratton.com) serves as a central hub for comprehensive resources related to your engine. You can often find updated versions of the 289707 repair manual PDF, alongside parts diagrams, troubleshooting guides, and frequently asked questions.
Furthermore, the site offers a robust parts lookup tool, allowing you to identify and order specific components needed for your OHV engine repair. They also provide warranty information and contact details for authorized service centers, should you require professional assistance beyond the scope of the manual.
Online Forums & Communities
Numerous online forums and communities are dedicated to small engine repair, particularly Briggs & Stratton. These platforms offer a valuable space to connect with experienced users who have tackled similar OHV engine issues.
Often, members share insights, tips, and even scanned copies of repair manuals, including the 289707 PDF. You can pose specific questions about your repair, receive guidance, and learn from the collective knowledge of the community, supplementing your manual’s instructions.